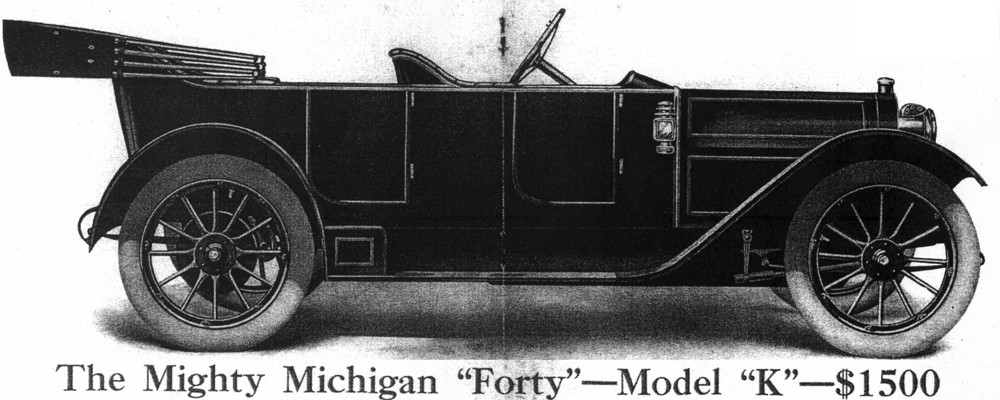
About mid-June of 2022, I contacted Robert Gagnon, a highly recommended pin striper. I’d first heard of Robert, and met him at the Fallbrook Vintage Car Show back in 2019, before the Covid pandemic. We traded information and I sent Robert photos of Michigan cars taken in the 1910’s. Each photo (go to:https://wp.me/P45zSY-8M) shows a bit of striping on the cars. Our job was to reproduce as close to original as possible the location and color of the stripes for the 1912 Michigan Model K. This meant, the hood and body were pinstriped – but the fenders and wheels were not. The advertising literature from the Michigan Motor Car Company indicates that the color of the pin striping was WHITE for the deep olive green cars. (go to: https://wp.me/P45zSY-7A The striping would generally follow this pattern:
The yellow line shows the approximate location of pin striping for the 1912 Michigan Model K.
Robert arrived at 8:30 am on June 22, 2022, with his car full of striping materials. The first order of business was to confirm the color of the stripes. While the advertising says the stripes were WHITE. There are lots of whites and some look better than others. Our decision was to have the stripes match the light grey of the wheels. A couple of test stripes on the deep olive green car confirmed that matching the light grey wheels was the preferred color – and it still stood out as “white”. Striping took about 6 hours and Robert completed it all in one day – with tired knees and wrists. First he carefully taped the curves to help guide his steady hand, but the tape was merely a guide for the paint brush. And the result was really stunning. The curves and beads in the body panels really popped after getting the accent added by pinstriping. Thank you Robert Gagnon. It looks great!
Taping before striping.
Robert adds striping to the engine hood.
Tape was a guide – not an edge for the striping.
The finished product. A beautifully striped and shiny car. Click on photo to enlarge and appreciate how far we have come. Woo Hoo!
On April 30, 2022, we packed up the Michigan in the “big white trailer” and headed South to drop it off at Ernie Romero’s shop. The car was to get a new top. Ernie had done a fabulous job on the upholstery and it only made sense to have him do the top as well. We had seen several others Ernie had done and they all look beautiful. The plan was to restore the top, side curtains and boot exactly as the original. And we had all the tattered, rotted, vermin pooped top parts to serve as patterns — including original side curtains, which very few cars of this age ever have. See top photos and a further explanation at: https://michiganmotorcar.com/nuts-bolts-2/folding-top-side-curtains/
Tori & Chris help unload the car in El Cajon near Ernie’s place.
We left the car, the new Haartz custom fabric and various fasteners with Ernie and headed home.
Ernie and I discuss the process of getting the top, side curtains and boot put together.
We got several progress reports from Ernie that showed the stages in putting a top on a horseless carriage. Just like a buggy, our car has top bows that need to be in just the right position if it is to go up smoothly and lay down nice and compact.
Top bows need to be in the correct positions if the top is going to work correctly and look smooth.
It is just the back, but that fabric looks amazing.
We needed to drop off some straps and fasteners, so Janet & I did an inspection tour on June 2, 2022. The car was looking great.
Janet & Ernie examine the side curtains – both new and old.
A few days later, Ernie sent us some photos of the car with the side curtains installed. We had never seen the side curtains on the car before. If we ever need them, I think it will be very claustrophobic.
Side curtains installed.
On June 18th, Ernie called and said the top was finished. We made arrangements to pick it up on June 18, 2022. IT LOOKED FANTASTIC.
Ernie shows us how the boot works to cover the folded top.
Slow backing uphill without power steering. Craig looks a bit concerned. But the boot looks GREAT!
Winched in, tied down and ready for the trip home.
From early on, we’ve had both warnings and suspicions about our Briggs Magneto.
Only just now am I understanding that the sage advice from several magneto mavens should probably have been heeded.
But hey – “It worked on the original car. Why shouldn’t it work now?” Um… there are a host of reasons why not……. but I didn’t want to hear them. And as the car gets more complete and we deal with the OBVIOUS problems, the less glaring flaws assert themselves. This happens in small bursts with little revelations as we try our car out on the road. Mind you – we are talking about little drives to test stuff. One mile, three miles, 5 miles was the longest. In these short drives the car has been running on BATTERY – deriving all electrical power from the battery through a 21st Century standard automobile coil
Modern coil in the firewall mounted BRIGGS switch box
(replacing the resin block of wires in the original firewall mounted wooden box)
Original coil encased in some sort of pink resin and lined with mica insulation material.
and then on to an interruptor set of points in the main magneto housing and from there through the distributor section of the magneto to the spark plugs. If you switch it to MAG. (magneto) from BAT. (battery), the engine coughs, sputters and then dies. It ran rough on magneto for a while, but I wouldn’t call it anything approaching nice and smooth. This is after two visits to the magneto guy in Orange, CA. and spending a fairly significant chunk of change with him as well. Hmmmmm. That is not how things are supposed to go. Perhaps I should have listened to the early warnings regarding our Briggs mag.
So, when I start the car (or TRY to start the car) we’ve seen the front cover of the distributor portion of the mag try to unscrew itself from the rest of the mag. And on a different occasion, the entire distributor cap portion, including the cover, tried to unscrew itself from its mounting position. This is not a good thing. Not at all. This sort of unreliability of the component parts of the ignition system necessitates a ritualistic step by step approach to every attempt to start the car. It’s a fairly long list of ways it wants to misbehave electrically. You must: check the battery, check the switch, check the wires, check the mag cover, check the mag mounting screws, check this, check that, check the other thing. Check everything but the Czech Republic. Um…… as a fancier of horseless carriages, we enjoy the simplicity of these early cars………. up to a point (or a set of points – which, of course, should also be checked.) Oh, and the unscrewing itself trick — this happens while the machine is running. Performance deteriorates quickly into non-operational stasis. Bricked. Kaput. Tow it home. BAD MAGNETO — BAD!
So– I’m going to do what I understand most owners of Michigan cars have done over the years. Retire the Briggs and install a Bosch. Yes, that Bosch – makers of home appliances, power tools, modern car electrics, medical devices and probably a host of things I can’t think of right now. Anyway, Bosch has been making automobile ignition systems since about 1897…..and Bosch ignitions have been keeping autos going ever since. RELIABLY. In the early horseless carriage days, many ignition brands came and went. Eisemann, K-W, Splitdorf, National, Mea, Simms, Heinze, Pittsfield, Kingston, Remy, Herz, Duplex, Connecticut, No-Lag, U & H, and the list goes on. About the only brands that have survived are Bosch and Remy (Delco-Remy).
So I acquired a Bosch magneto setup. For this car, which needs to be able to be started on battery if I am ever to attempt to get the acetylene starter to function, the choice was a period correct Bosch DU-4 DUAL Ignition. “Dual” in the case of this particular version of the Bosch DU-4, means both a self sufficient magneto (not requiring a battery) AND a separate battery based ignition. Two separate switching positions and two separate sets of interrupter points. The BRIGGS magneto that came with our car was intended to be used this way – but appears to have only one set of points. Generally speaking, you start on battery (requiring MUCH less hand cranking effort) and once the car is running, you flip the switch to magneto – which does not draw down the battery.
My “new” Bosch Dual Ignition magneto and switch. Both somewhat encrusted with 110 year old loveliness.
With the two Bosch components in hand, (magneto and its separate dash mounted switch-coil) the cleanup began to get them working together as they were intended. The original documentation helped – but proved to be lacking in troubleshooting suggestions. At least ones that I could recognize and deal with.
The full manual is attached below. Click on the description.
As of the date of this writing, May 18, 2022, my bench testing shows the MAG. side of the ignition works as it should. The BAT. (battery) side does not. So – I may need some expert assistance to get this all working. With the BRIGGS, only BAT. works. With the BOSCH only the MAG. works. To know how this feels, play the recording, below.
BUT WAIT! Good news. For the next several days I went through the entire wiring setup AGAIN. I consulted the fellow that I bought the magneto from. I queried other horseless carriage owners. During such consultations, I was advised to change the wire leads on terminals 3 & 4 from 12 gauge wire to spark plug wire (high voltage insulated). That was nice and stopped some arcing at the back of the switch – but still no sparks at the plugs when switched to “battery”. Hmmmmmm.
Testing the Bosch magneto and switch
Better check all the connections again and clean the contacts everywhere. Including both sets of points (interrupters). Lets just check the gap on the interrupter for the battery setup. It looks like it’s opening and closing but maybe not. Let’s adjust it open a bit more. ZAP! We’ve got SPARK!
PROBLEM SOLVED! The Bosch DU-4 Dual Ignition works as advertised. This is very good news, indeed.
With our mostly sealed transmission and thoughts of getting the car truly road-worthy, we started taking little jaunts around town. On December 2, 2021, we took Janet’s high school buddy, Gina Ensalaco, on a ride that was revealing of a weakness in the drive-train.
Gina and Craig at Tamarack and Pacific Coast Highway. Note the Carlsbad Encina power plant with no smoke stack thru the windshield.
What became very clear as we got closer to home was that it was becoming more and more difficult to shift the car in ANY gear. I thought we were not going to make it, so I left it in first gear for the last mile or so and rolled a couple of stop signs where there was no traffic. This was a problem I’d experienced earlier. The hex head bolts I had replaced with socket head bolts & lock washers for the throw out bearing pressure plate were UNSCREWING themselves again – damnit. (See original problem explained at: https://michiganmotorcar.com/so-many-things-to-adjust/ ) So here we go again.
I’ve had the throw-out bearing and front universal joint out so many times that I welded up a jig or cradle to hold the piece in place on my hydraulic floor jack. Let me tell you how unpleasant it is to stand on your head to while trying to get 12 bolts removed or installed while holding 18-20 pounds of universal joint in one hand and a wrench in the other. Try aligning twelve little holes with a greasy floppy U-joint trying to slip out of your grasp. The new tool support changed it from a hateful exercise to a merely tiresome one.
U-joint support tool helps make alignment less onerous.
With the addition of Locktite® red thread locker goop, we will see if the fix is at least MOSTLY permanent. ( Cue the bright uplifting happy soundtrack – Zippity Do Dah or similar.)
On December 1, 2021, we received a shipment we had long been awaiting. Christmas came early – and from Acton, Massachusetts.
Janet displays the custom top fabric, just arrived from Haartz Corp. It’s pinstriped and a near perfect match with our original fabric.
I had first contacted Eric Haartz in December of 2014. Eric, grandson of the company’s founder, was intrigued by our Michigan’s family story and our original pinstriped fabric. And, Eric has been a very long time active member of the Horseless Carriage Club, which probably goes a long way towards explaining his interest in our project.
First, a bit about the Haartz Corporation which grew out of a top fabric company started in 1897. It is now a world wide company with operations in Massachusetts, Michigan, Germany, China, Japan, India, and Mexico. They supply both interior and exterior (convertible tops) fabrics for the most exclusive brands of automobiles as well as other specialized applications. Eric was both enthusiastic and super detail oriented in all our communications which required sending him swatches of our original (faded and aged) top fabric. As I write this, we are anxiously awaiting our trip to Ernie Romero’s shop to start the transformation of this beautiful fabric into a one of a kind Michigan top. For the un-initiated. Most tops for cars of the Michigan’s vintage no longer have original tops. One hundred year old fabrics seldom survive. If they do, typically they remain folded up and mostly unseen for fear of shredding into brittle bits if the top is opened up. Additionally, most tops were either BLACK or some flavor of beige. And almost NONE were pinstriped or otherwise decorative. Eric told me that his recollection was that his grandfather sometimes got inspired by men’s suits and adapted some of these patterns into automobile and other fabrics. Very few of these patterns for automobiles survive on antique cars. They have typically been replaced with BLACK. We believe our car’s top will be simply outstanding.
Pinstripping is best seen in the folded section. CLICK TO ENLARGE
On November 27, 2021 we started the car up. This has been no real problem so far. It is starting remarkably easily -usually 1/4 turn of the crank, once the engine is primed. And drove to the nearest gas station for a fill up. Reverse gear out of the garage was a bit noisy with a distinct whirring, but there were no horrid crunching munching grinding noises. That’s good. However when stopped to fill up and on looking at the ground wherever the car was briefly stopped. There was a little puddle of oil – specifically – transmission oil.
Look for the line of little shiny drips under the car. That’s our transmission fluid.
So, back to the garage where I would investigate why we were losing so much fluid so quickly. On our way, Janet & I delighted in the smoothness of the gear changes – with or without a transmission full of oil.
Inspection showed that the transmission output seal was not doing its job – at all. There was wear on one of the surfaces that simply didn’t want to seal with a felt washer.
Output shaft seal plate was scoured and rough. The single felt seal was not adequate.
So I made a large brass washer on the lathe and put that in. It seems to have slowed the drips.
Brass washer installed with thicker felt washer and an O-ring on the U-joint side.
On November 5, 2021, I wrestled out the transmission and took it down to my workshop. While it is only held in place with 4 long bolts, the combination shifter and hand brake shaft requires some finesse to wiggle it free, even after the front and rear universal joints are detached.
Shifter and cross shaft removed.
Transmission ready for transport.
Once I opened up the transmission, I inspected the gears. Although some were rounded on the leading edges of the teeth which meshed, they weren’t badly worn. Nor were any teeth missing. The Hyatt bearings on either end of the drive train were in very nice shape. This was all observed by fellow HCCA member Bill Ottemann who brought by some bushing material and drill rod for building a new shaft and bushing for the Reverse idler gear. The photos below show why this might be important.
Reverse idler gear & shaft. This is what was jumping up & down.
So – what do you think? Does the shaft look smooth? Is the bushing tight? Is 1/8″ clearance considered a fit?
Ugly – no matter what the angle of the photo.
Good grief! No wonder reverse gear made a noise. I drove out the bushing and put a new 1″ chunk of drill steel in the lathe to turn to the appropriate diameter for a new bushing for the gear.
Exploded view of the transmission. Reverse idler in lower right. Click to enlarge photo.
On November 13, 2021, we drove up to Fresno to visit family and pick up my Dad for a trip to Carlsbad and work on the Michigan. The shaft was turned, drilled for tapered pins and the new bushing was put in the gear.
Reverse idler gear & shaft — old and new.
Dad & I inspect shafts and fit.
During the process of getting ready to re-install the transmission gears, shafts and bearings, we discovered that 1) the main drive pinion, and 2) the bushing inside it and 3) the front portion of the main drive shaft that the main drive pinion turns on had heavy wear. This needed to be addressed and ended our hope that we would be able to get the Michigan back on the road while Dad was visiting. The most straight-forward way was to turn the front 3.5 inches of the main shaft slightly and replace the bushing with one that was slightly oversized to match the turned shaft.
Annotated exploded transmission, showing main drive shaft & main drive pinion
Turning a few thousandths off the Main Drive Shaft was fairly simple. Getting the bushing turned both inside and outside to the correct size was a bit more effort. But the greatest effort was trying to get the old thrashed bushing out. I tried heating, a hammer puller and finally resorted to a hack saw and screw drivers to bend and crush the bushing to the center. What a hassle.
After all else fails — hacksaw the bushing
Pry the bushing out in chunks.
New bushing ready to press into Main Drive Pinion.
Pressing the bushing in.
With the main problem components of the transmission refurbished, it was time to re-assemble. The troublesome reverse idler shaft and gear were taper pinned into the newly painted transmission housing (interior was coated with red insulating varnish).
Reverse idler gear with new shaft installed in lower transmission housing.
And then – I re-assembled the transmission. It will be noted that none of the meshing gears are pristine. They all have leading (meshing) edges on their teeth that are a bit munched, rounded and tapered. My colleagues in the Horseless Carriage Club that have viewed the gears commented that “they really don’t look too bad”. So back in they go – munched and nibbled teeth notwithstanding. I’ve attached a partially annotated photo of the transmission below.
Annotated Michigan transmission photo. CLICK TO ENLARGE
By November 26, 2021, I had the transmission back in the car. It was time to test my handywork. (Cue the ominous background music.)
The La Brea Tar Pits is one of my favorite places, having first visited in a 3rd Grade field trip before there was a Page Museum on the site. If saber tooth tigers, dire wolves, mastodons and mammoths interest you, then there is no better place in the world than the La Brea Tar Pits. https://tarpits.org And if you are on this site because you like automobiles, the Peterson Museum is across the street and down 2 blocks. https://www.petersen.org
After visiting the tar pits, we got back to Michigan business by putting on a new set of tires and investigating the cause for the terrible noises in reverse.
Four new NON SKID shoes for the Michigan – $2160 and you can install them yourself.
Clarence’s assistance made tire mounting so much easier than trying to do it solo. Thank you, Clarence. To fully understand the way new tires are mounted on our Michigan, you should probably visit my web page that talks about our Detroit Demountable Rims, which although NOT unique to Michigan cars, are fairly unusual. https://michiganmotorcar.com/nuts-bolts-2/shortsville-whee…demountable-rims/
Then we tried to figure out what might be this issue with the REVERSE noise. We jacked up the rear of the car with the REVERSE gear engaged so we could manually turn over the transmission by rotating the rear wheels. During this, we left the observation hatch open – Yes, there is an observation hatch for adding heavy oil and looking at the gears. (But you better not have it open while operating the car, because you will get drenched.)
Transmission with observation hatch open.
With me peering into the transmission with the shifter in REVERSE and Clarence rotating the rear wheels slowly forward and back, I could just make out a gear jumping up and down. This gear was the reverse idler gear. It is the one at the very bottom of the transmission on a shaft by itself. Of the many things a gear might do (mostly going round and round or sliding along a shaft when the shifter is moved, this particular gear was jumping up and down on the shaft each time the rear wheels changed direction. The jump was not along the axis of the shaft, but up and down ON the horizontal shaft – like it was terribly loose. It wobbled a bit too. Yeeks! That is not a thing a transmission gear should be doing. So…… I was destined to pull the transmission and figure out why this gear was so jumpy.
Before Clarence & Sally left to return to Indiana, we manually backed the car into the driveway for a photo op.
Once I had the Michigan up the hill and on the street, Janet & I took a very short journey down the block.
Janet & Craig’s first & very short ride in the finished Michigan.
It was immediately clear that the clutch was not working well and was rapidly becoming inoperable. We quickly put the car into our regular garage and I sought out the problem.
Our 1914 Model T Ford and the 1912 Michigan in the garage.
Apparently the bolts holding the throw-out bearing pressure plate were unscrewing themselves, thereby lengthening the throw of the throw-out bearing. The clutch pedal went to the floor without anything happening. So, I screwed the bolts back in and figured, that I simply hadn’t tightened them enough. Then reinstalled the heavy and greasy U joints. That should do it………………… wrong. (At the time of this posting – Jan. 8, 2022, this problem was to revisit us several more times — until we resolved the problem — maybe? I hope!)
The next issue was one that presented itself when trying to get the car turned around to go up the hill from the workshop. (just prior to the video, above) The car made fine RIGHT turns, but LEFT turns were very restricted. I was really scratching my head trying to figure out what was wrong with the steering gear or front suspension. Had I broken something? No — I hadn’t. It was just a small installation error. The pitman arm was hitting a nut that fastened the steering gear to the frame. I needed to reverse the ends of the bolts so that the bolt head (narrow) would be adjacent to the pitman arm (allowing it to pass by). The nut side stuck out too far and stopped the arm from swinging the necessary distance to allow a proper left turn. Problem solved.
On October 10, 2021, we got the car back out started it up and took it down the street. Same problem – shifting becomes very difficult when the throw-out pressure plate unscrews itself and gets loose. I barely made it back into the garage after a 3/4 mile lap around the neighborhood. This issue clearly required more thought and a permanent fix.
This time I completely removed the pressure plate/throw-out bearing retainer. It was held on by 4 slotted bolts, that were made to be tightened with a screwdriver (not a whole lot of torque). I replaced these with 5/16″ x 18 t.p.i. socket cap screw bolts with lock washers. Close examination of the retaining plate revealed punch indentations adjacent to the four plate holes. Apparently I was not the first person to experience this problem. The original slotted bolts had been “staked” by a previous repair person. STAKING is a method (not a very good one) of stopping a bolt or screw from loosening. A metal punch is used with a hammer to put a dent in a bolt or the adjacent metal to use the burr created by the punch to keep the bolt from unscrewing. It permanently deforms the metal and sometimes works.
Dents adjacent to the 4 central holes in the plate show “staking” of the slotted (right group) bolts. Left group & lock washers for replacement.
The new socket cap bolts were inserted and tightened with an Allen wrench. This should hold a lot better than the slotted bolts.
The leaky rear hubs were the next issue. Gear oil from the differential was finding its way out the axle tubes to the wheel bearings and out onto the wheels and rear brakes. In the two brief rides we took with the Michigan, it was noticeable that the car did not really want to stop. This is a very not good condition. Oil and grease from prior use of the car (probably about 100 years ago) had saturated the brake pads (inside the drums) and the brake bands (outside the drums). New leaks from the axle tubes would not improve our stopping power.
Heavy gear oil from the differential flows down the axle tubes and escapes onto the wheel and brake drum.
The solution to the leaking oil is a set of seals. The inboard side of the hub has a rotting leather seal with what appears to be oakum packing (Nasty fibrous oily tarry burlap) providing packing behind the seal. This seal has failed. So we need to find a solution.
The old leather is tediously riveted in place with copper rivets. Because these seals are notoriously leaky, and replacing it would be a truly awful project requiring the creation of new tools to fit into the very tight dome area, we are going to try a work around. If the work around fails, this will be a future project. What is also missing is several felt seals that go on both sides of the hub.
Inside of Rear Wheel
The next project was to cut felt seals of the correct dimensions. To do this I needed to create a set of cutting dies to be used in my hydraulic press. The felt is one half inch thick so scissors are not very useful. Dies were made from short pieces of tubing which I sharpened on one side in my lathe. Then the felt was placed on a flat piece of scrap wood, the die positioned on the felt, and the ram for the press positioned above a chunk of steel to spread the force over the entire circumference of the tubing section. Then apply pressure from the hydraulic jack.
Dies and cut felt seals
Ready to cut the felt seal.
Several sizes of felt seals were required for the rear axles.
While I was workin on the rear axles, it became obvious that I needed to work on the brakes. They were both (internal hand brake and external foot brake) saturated with old oil. These original brakes were lined with what is undoubtedly asbestos, and – other than being oil soaked, were in remarkably good shape.
Royal Equipment Co. Duplex brakes with Raybestos brand lining – and a lot of grease & oil.
I cooked the brakes in bath of super degreaser that I have used previously for 36 hours at about 150 degrees (TASC – Total Aqueous Systems Cleaner from Green Power Chemicals). It removed a lot of oil, but unfortunately not all. I will get to revisit the brake linings at some point in the future, because they still are not as grippy as they need to be.
Cooking the brakes.
The week of October 24 – 31, 2021, Janet’s sister Sally and her husband Clarence Davis flew in for a visit…… and as always, Clarence got drafted to work on the Michigan. (He and Sally were custodians for the car from 2011 to 2013 and restoration contributors all along.) We got busy working on the rear axles to stop the leaking. We installed new felt seals, new oakum packing behind the felts, an O-ring just because and a squirt or two of magic Ultra Black RTV sealant. We will see how it all works…………………………….. or doesn’t.
Clarence cradles an axle while I prepare to commit modern automotive sacrilege with silicone sealant.
With the rear axles installed with new and non-leaky seals (we hope), the next order of business is to fill the differential with heavy oil. My horseless carriage consultants advised that if the SAE 140 weight stuff was moving out the axle housings and escaping into the brakes, I should GO BIG. Use SAE 1500 weight. This is seriously viscous stuff. Start pouring it in now and by next October, it should be in the differential. But seriously, we did heat it in a water bath before trying to pour it in. And we did get some lunch while the last glops got differentiated.
Clarence bides his time while the goop in the funnel slowly follows gravity.
After lunch, it was time to see if our work paid off. Let’s go for a ride! BUT WAIT, WAIT, WAIT!
What’s that horrible grinding in REVERSE?
I hadn’t used REVERSE before. And that sounds like marbles in a blender. Oh dear. That is NOT good. Put the car back in the garage. We have to figure out what that noise is about. But not today. If we cannot get a ride in the Michigan we’ll have to go do something else. Since we have been dealing with slow viscous fluids…….. we naturally needed to visit…
The LA BREA TAR PITS! Home of real fossil fuels – Pleistocene pachyderms among others.
On October 3, 2021, I added some gas, checked and rechecked the magneto, primed the priming cups and cranked it over. It started on the second pull. Our flight plan? Out of the workshop, up the hill out of the backyard, and into the garage.
(Click on the four way enlargement arrows in the photo, above, to fill the screen)
You have no idea how remarkable it is to have experienced this day. It has been a long time coming. But, as I will explain in the next few posts, once the car is assembled and is technically operating, it does NOT mean that it is running correctly.